The Dynamo is NOT a mobile class. 1v1 you are likely to win, but when you are outnumbered, it is hard to retreat and hard to take on multiple enemies from different directions. So what am I supposed to do?
It's easy: just camp behind a wall and slop ink around with your sprinkler buddy as a means of area denial and capture 1/4 of the stage!
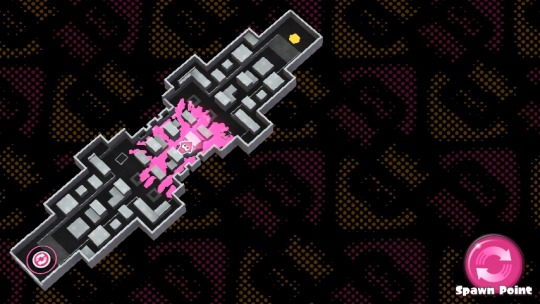
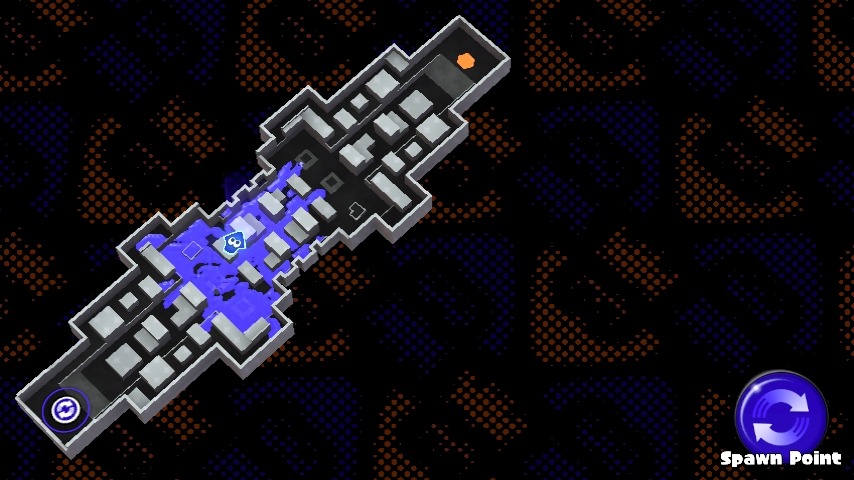
Format: So the first pic will show the map and how much range you have from that spot!
Blackbelly Skatepark
Spot #2
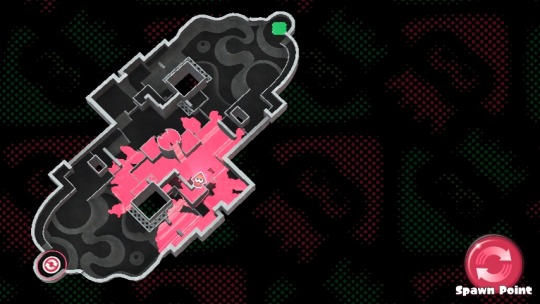
Moray Towers
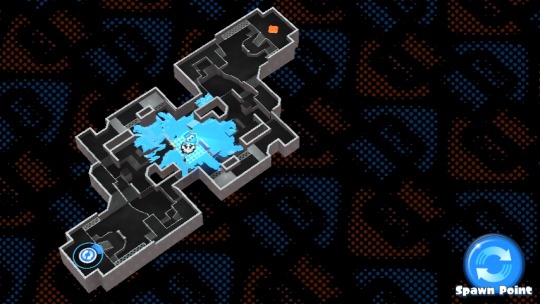
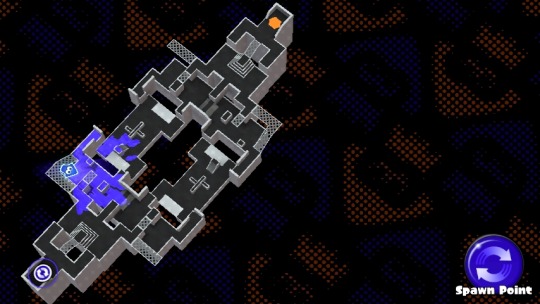
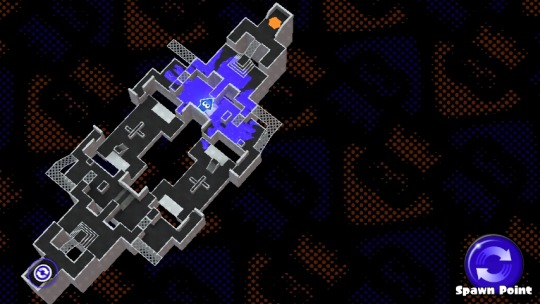
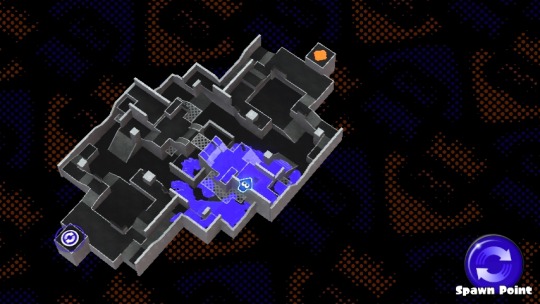
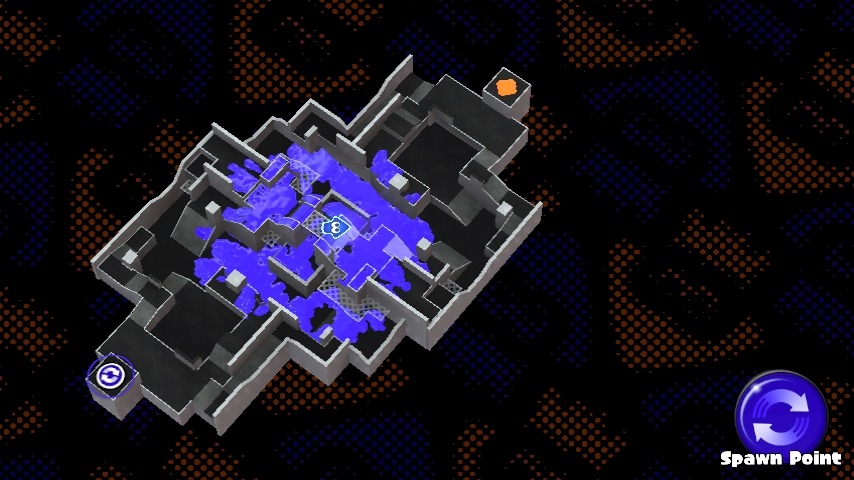
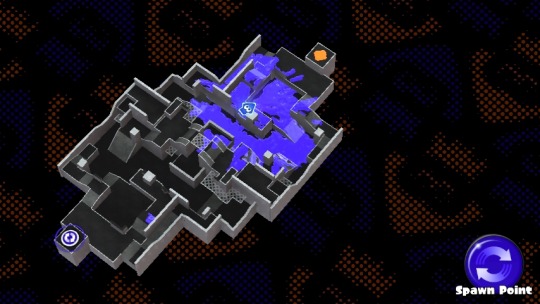
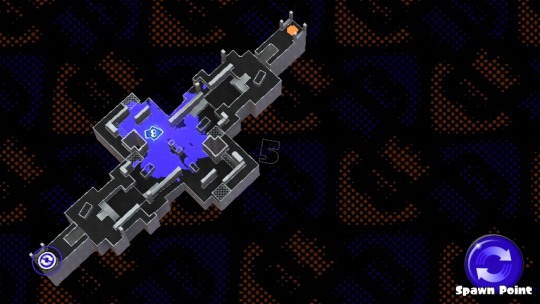
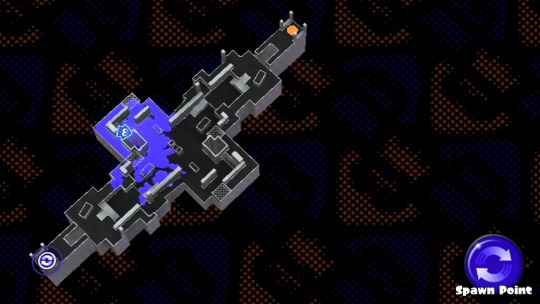
Camp Triggerfish
10/10
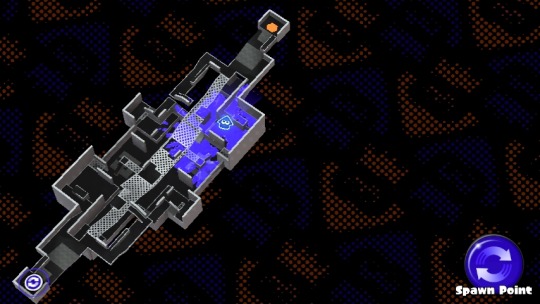
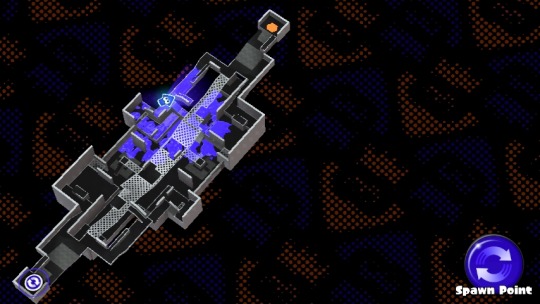
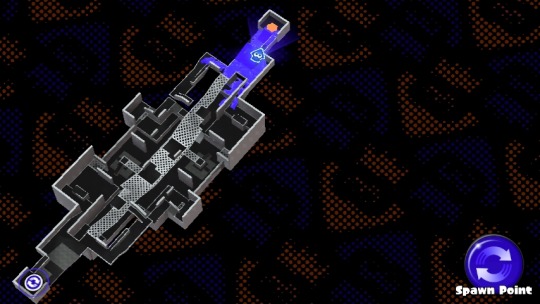
Kelp Dome

Spot #2
i would definitely prioritize spot 1 over this spot just because spot 1 covers the main entrance. use echolocator to track enemies and switch between the two spots when opportune.
sign/catwalk for cover. sprinkler buddy should still be in spot 1. if someone has got that spot covered then i recommend putting sprinkler buddy on the tree.
Arowana Mall
Spot #2
Mini Spot
Not meant to camp in, but just to help clear the middle section especially if theres a charger campboy sitting on one of the perches giving your teammates a hard time.
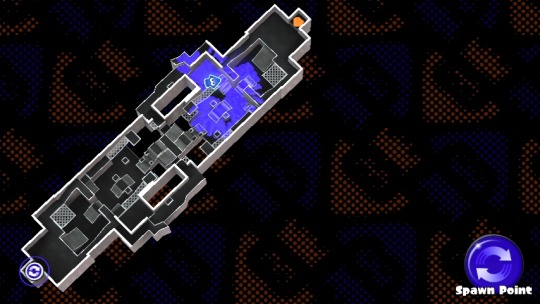
Urchin Underpass
Spot #2
If the enemy team has got the middle locked down. Try to sneak up the wall on the right and attempt this spot. Works well to pressure them.
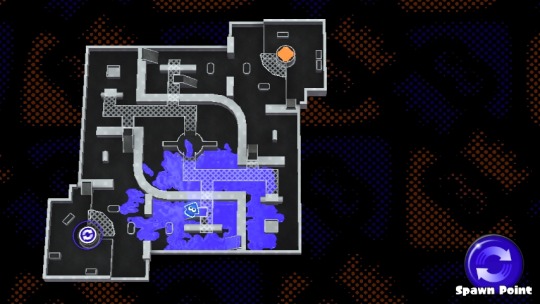
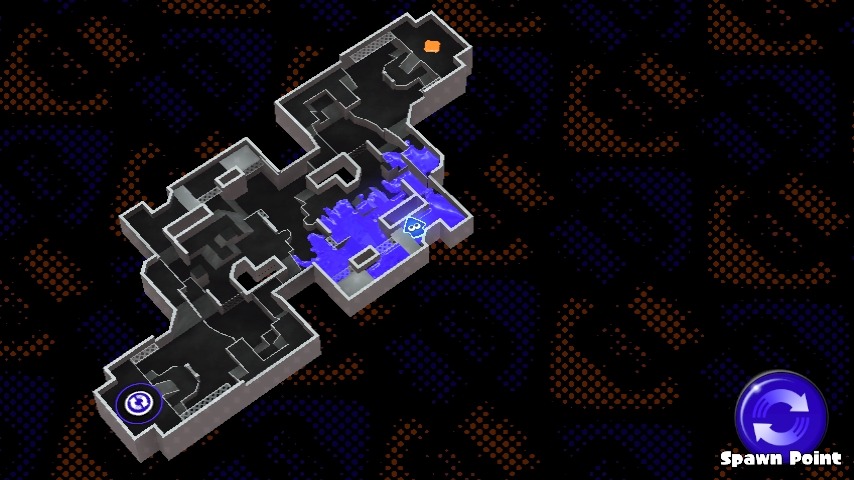
Saltspray Rig
Oh my god this spot is Soooooo good. I never thought it was possible to spawn camp a team on saltspray until I came up with this strat. You can cover anyone trying to climb the pipes/wall. Sprinkler buddy will cover the blindspot corner on the left. Alternatively sprinkler buddy can be placed on the wall next to the light bulb, depends on your enemies' weapon range. Just pay attention to the gamepad. quite easy to tell if someone is riding the elevators.
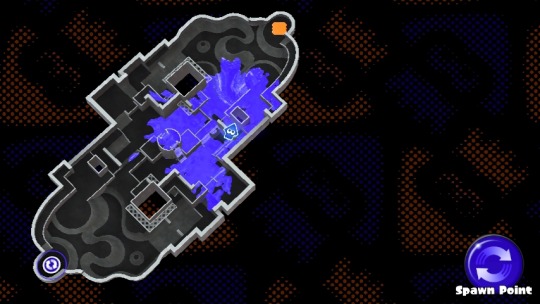
Bluefin Depot
Sadly, due to the map layout, you'll just end up playing like a charger ; acting as the goalie preventing anyone from climbing up. Then push at the last 10 seconds to guarantee that >50% turf. Its not a bad thing , its just not the best use of the dynamo's ability.
However, here are a couple spots. I do not recommend these spots because you are at an elevation disadvantage, narrow spacing means a well placed splatbomb will result in death, and too many sides to watch for, but feel free to try them.
I actually meant to go to enemies side but just imagine this but flipped
Spot #2
the better spot. beware this is a narrow area. quick jumps and bomb sniffer are recommended.
Port Mackerel
Spot #2
little more safer. more of a goalie role.
Flounder Heights
there are many options to take in this map but this spot is definitely the most low risk > high reward choice.
Spot #2
Middle of the map, so you'll be turfing way more..but also a little unsafer.
Spot #3
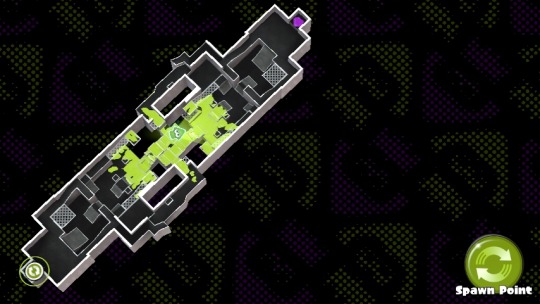
Walleye Warehouse
Spot #2
this spot is great for adding pressure when the enemy team has the middle locked down. this entire corner is made up of walls. youre pretty much safe.
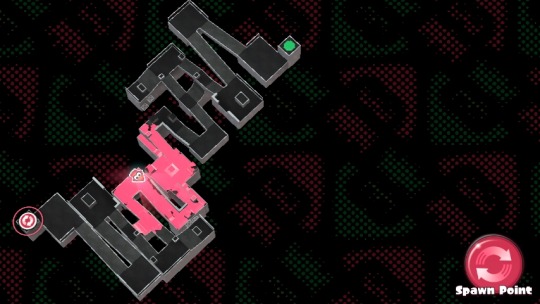
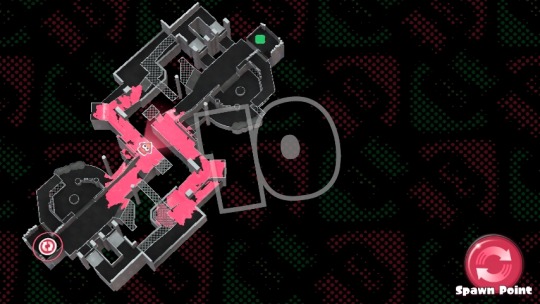
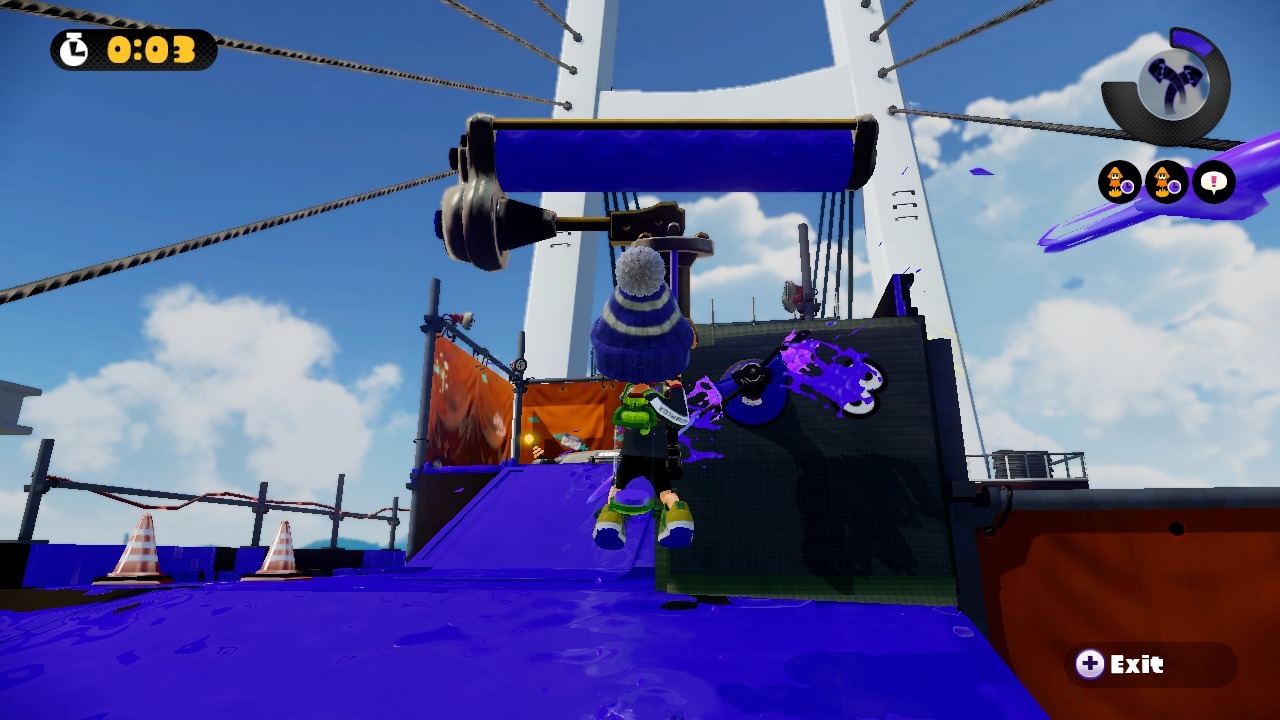
Hammerhead Bridge
Spot #1
Spot #2
Spot #3
spawn camppppp
Spot #4
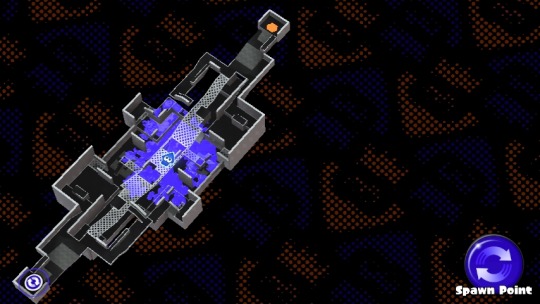
your go-to spot
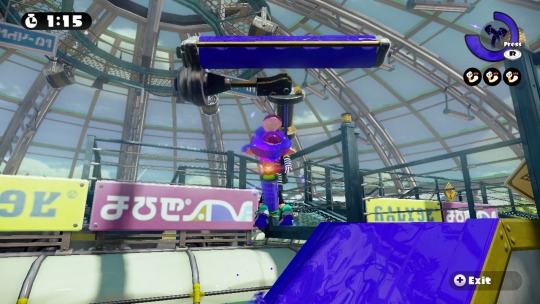
Recommended Gear
Remember this a defensive strat
Bomb Sniffer + stacked Quick Super Jumps.
- why? because you can cancel your swings into a superjump. should you see a killer wail/ inkstrike / bombs just superjump away and you will live. This is very common as most people will rely on those to kill you when youre hiding behind walls. If you die then your sprinkler dies too....
stacked Special Charge Ups
- its easy to build points this way. echolocator is great for defense as you can intercept enemies and know where to go. not to mention is acts as a quick insta-refill for your ink; negating the need for ink savers/recovery ups. (also since they increased the points needed for echolocator)
stacked Damage Ups
- I only recommend this if you're playing with your squad and they know your strat and synergize. Damage Ups essentially increases your effective kill range.
It's easy: just camp behind a wall and slop ink around with your sprinkler buddy as a means of area denial and capture 1/4 of the stage!
Format: So the first pic will show the map and how much range you have from that spot!
Blackbelly Skatepark
Spot #2
Moray Towers
Camp Triggerfish
10/10
Kelp Dome
Spot #2
i would definitely prioritize spot 1 over this spot just because spot 1 covers the main entrance. use echolocator to track enemies and switch between the two spots when opportune.
sign/catwalk for cover. sprinkler buddy should still be in spot 1. if someone has got that spot covered then i recommend putting sprinkler buddy on the tree.
Arowana Mall
Spot #2
Mini Spot
Not meant to camp in, but just to help clear the middle section especially if theres a charger campboy sitting on one of the perches giving your teammates a hard time.
Urchin Underpass
Spot #2
If the enemy team has got the middle locked down. Try to sneak up the wall on the right and attempt this spot. Works well to pressure them.
Saltspray Rig
Oh my god this spot is Soooooo good. I never thought it was possible to spawn camp a team on saltspray until I came up with this strat. You can cover anyone trying to climb the pipes/wall. Sprinkler buddy will cover the blindspot corner on the left. Alternatively sprinkler buddy can be placed on the wall next to the light bulb, depends on your enemies' weapon range. Just pay attention to the gamepad. quite easy to tell if someone is riding the elevators.
Bluefin Depot
Sadly, due to the map layout, you'll just end up playing like a charger ; acting as the goalie preventing anyone from climbing up. Then push at the last 10 seconds to guarantee that >50% turf. Its not a bad thing , its just not the best use of the dynamo's ability.
However, here are a couple spots. I do not recommend these spots because you are at an elevation disadvantage, narrow spacing means a well placed splatbomb will result in death, and too many sides to watch for, but feel free to try them.
I actually meant to go to enemies side but just imagine this but flipped
Spot #2
the better spot. beware this is a narrow area. quick jumps and bomb sniffer are recommended.
Port Mackerel
Spot #2
little more safer. more of a goalie role.
Flounder Heights
there are many options to take in this map but this spot is definitely the most low risk > high reward choice.
Spot #2
Middle of the map, so you'll be turfing way more..but also a little unsafer.
Spot #3
Walleye Warehouse
Spot #2
this spot is great for adding pressure when the enemy team has the middle locked down. this entire corner is made up of walls. youre pretty much safe.
Hammerhead Bridge
Spot #1
Spot #2
Spot #3
spawn camppppp
Spot #4
your go-to spot
Recommended Gear
Remember this a defensive strat
Bomb Sniffer + stacked Quick Super Jumps.
- why? because you can cancel your swings into a superjump. should you see a killer wail/ inkstrike / bombs just superjump away and you will live. This is very common as most people will rely on those to kill you when youre hiding behind walls. If you die then your sprinkler dies too....
stacked Special Charge Ups
- its easy to build points this way. echolocator is great for defense as you can intercept enemies and know where to go. not to mention is acts as a quick insta-refill for your ink; negating the need for ink savers/recovery ups. (also since they increased the points needed for echolocator)
stacked Damage Ups
- I only recommend this if you're playing with your squad and they know your strat and synergize. Damage Ups essentially increases your effective kill range.
