
- Introduction
Hi! So you've decided to pick up the L-3 Nozzlenose huh? Welcome! I'm one of those players who rants and raves about the disruptors in the game, I find them to be one of the most satisfying, versatile, and useful sub-weapons available. Truth is the style of play they require just isn't for everyone. They essentially fill an entirely supportive role. Like always I'll be giving you solid advice as to when you should apply the disruptor. Unlike the Custom Splattershot Jr. which relies on a purely stealth based approach, the L-3 Nozzlenoze functions more as an assault, stealth hybrid much like the Blaster which means you won't have to rely on disruptors to win every fight.
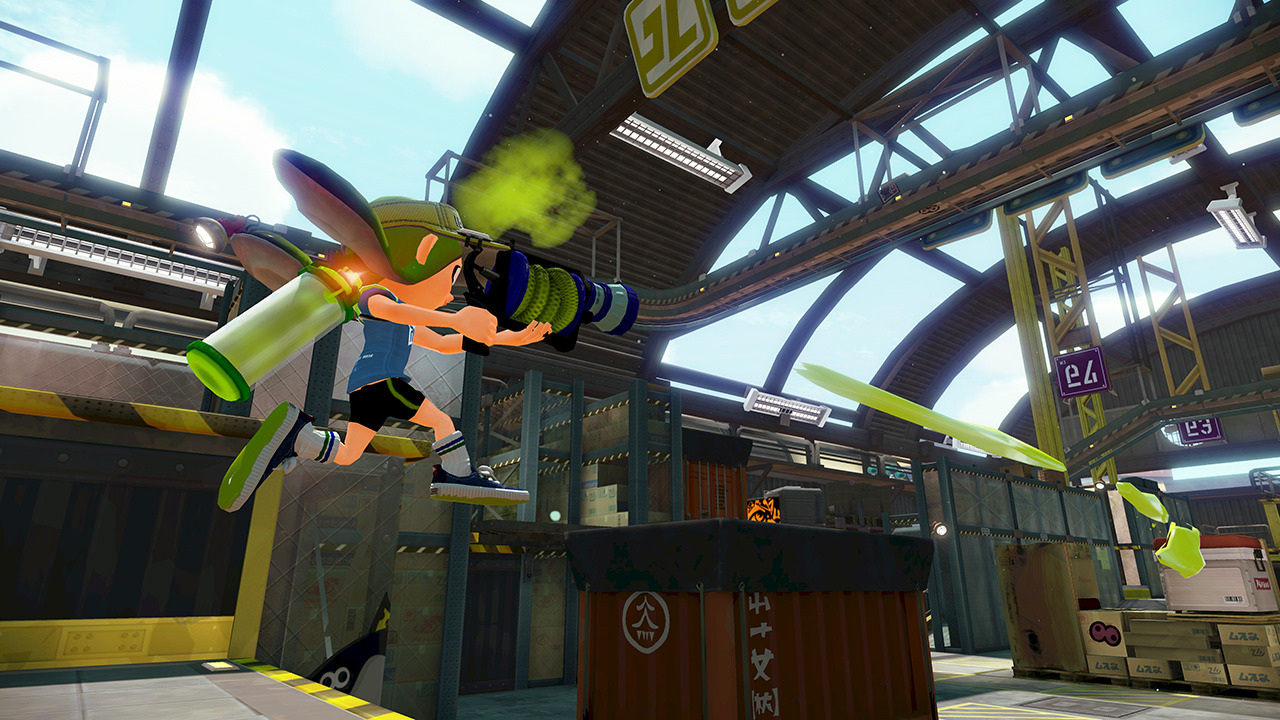
When you first equip and try out the Nozzlenose you'll notice that it functions much differently than any other shooter in the game. It fires in 3 round bursts with very precise accuracy. It's also semi-automatic, meaning that you must press the ZR button each time to fire - this means you can't hold the button down for continuous fire, making this weapon for those who don't mind periodically/rythmically tapping the fire button. The range is really good, but it's lack of full auto turns many players off of the weapon instantly.
- Long Distance Advantages
The Nozzlenose fires in a near perfect line, with a very high rate of fire per burst/trigger pull. It's rate of fire is so high you'll usually find that if your first bullet hits, the other two typically do as well, though they can miss on rare occasion, if the opponent reacts quick enough. The base damage of each ink bullet does 29 damage unimpeded by defense buffs. This means that even if your 3rd bullet misses (and it usually doesn't) you'll still do a total of 58 damage. When all 3 hit you'll do a total of 87.
You'll need to hit your target in two trigger squeezes to splat. Making good aim VERY necessary (so practice a bit). The biggest advantage the Nozzlenose comes with is it's superior range. It reaches almost as far as a Splattershot Pro being beaten out in range just barely, It's also beaten in range by the Jet Squelcher by just a bit more. Meaning it's very good for taking out Chargers like the squiffer, and other ranged opponents if you flank, and space well. The Splattershot Pro is one of the most commonly used weapons in game, so the L-3 Nozzlenose's range can give you the edge you need to compete with it if you flank properly. The range of the Pro only beats out the L-3 by an extremely short margin, but if the two weapons meet at their max distances --- the Pro will win, so make sure to close the gap.

From right to left: Nozzlenose Splattershot Pro Jet Squelcher
The Nozzlenose is good for keeping a safe distance between shots, while picking at enemies such as Juniors, Aerosprays, and Gals from just outside of their range. One fully connected burst fire will insure a retreat from your opponent. If they don't, they risk one of your ink bullets (or an allies) finishing them off. This makes the weapon very useful for forcing opponents to proceed with caution when engaging at choke points.
A good Nozzlenose can be a great ally to a Charger. Giving ground support with it's range to take out direct threats to the Charger, such as approaching Jet Squelchers, Pros, etc. Not to mention the use of disruptors giving Chargers an upper hand.
- Fire rate
The semi-automatic fire leaves you open between shots, so even though it's so easy to hit with all 3 bullets in a single shot, you'll need to insure you can get a second set of shots off quickly before they flank, or hit you with their superior firing rate. Equally ranged weapons will still have the advantage of continuous fire, and will be better at suppression, which will be harder for you to counter without an ally.
The base fire rate of the weapon is actually very good with proper rhythm. Rapidly pressing ZR will actually hinder your fire rate. Practice in the training room to get a hang for the rhythm of the weapon, because if used properly it's fire/kill speed is actually quite good.
If all three of your bursts shots don't connect however you will need to even that out by insuring at least two of your next bullets hit. This can make your fire/kill speed vary quite a bit, and if you're not great at aiming - well you're going to get inconsistent results a lot.
- Ink Coverage/Consumption, and Movement

Here you can see the general pattern each shot fired will make.
The L-3's worst downfall isn't actually in it's semi-automatic feature. It's in it's poor coverage. Your shots will fire in small unconnected splatters. This splotchy pattern makes it very hard to create a decent movement path via swimming - and it makes it very difficult for you to cover points of interest, like Splat Zones and makes for poor coverage in Turf War. This gun is primarily for those that want to take on a slaying/splatting role, since it outranges most guns aside from .96/Pro/Squelchers. You may also have some trouble with Dynamo Rollers but the disruptors you come equipped with will help on that front.
You're best movement options strangely enough is running on foot. Since between shots you'll have small bursts of running (even when done rhythmically and quickly) making movement while shooting very effective. This gun will leave your opponents in daze when in a straight up on foot fire fight. Most Chargers will also have trouble with you because of this. I suggest Run Speed Up, and Ink Resistance to compensate for your mobility woes. The sporadic on foot movement this weapon provides makes for a very unorthodox play style. You won't be hiding in ink much, unless you're using the buddy system, and have teammate making lot's of ink to support you.
Lastly - Ink consumption. The ink efficiency of this weapon is pretty average. This means you won't run out of ink terribly fast, but it's not a Splash-O-Matic, or an Aerospray either. You're going to want to make sure to keep an eye on your ink tank, since if you get stranded without ink you're likely to have a bad time, but that's a given with any weapon.
- Disruptors!

Disruptors are amazing tools for a lot of situations. Find yourself pinned by enemy fire? Throw a disruptor, and quickly escape, regroup, or flank! Need to stop that Charger from moving so that you and your team can get rid of them? disrupt them to keep them still. Hopping Dynamo Rollers hurling ink much further than they should? Disruptor! It's amazing how well the disruptor can turn tides, especially on enemy teams of two, who are covering each other in close quarters! What does the disruptor do? Well allow me to list its effects.
- Slows movement as if they were in enemy ink.
- Slows swim speed, and causes them to glow while submerged.
- Slows ink recovery rate.
- Limits jump height as if they were standing in enemy ink.

Here you can see the max width of the blast radius on the disruptor.
The disruptor explodes immediately upon contact with any solid object in a sphere formation. The explosion will reach through thin walls so it can be used to hit enemies around corners, this coupled with an echolocator active is amazing at stopping an incoming enemy, or group, or enemy you know will be approaching from around corners. Disruptors are the ultimate ambush tool, and they can help your fellow Chargers catch their prey.
Disruptors can also aid those with bad aim. If you have a hard time catching your opponent with your shots, because their jumping and so on, use a disruptor to make them stay still. The applications for this sub are huge. It's one of the most versatile subs in game.
- Killer Wail

The Killer Wail isn't considered the most amazing special, due to the very large warning/window it gives your opponent to move. It's typically used to flush out enemies from hiding, and take enemies out that are trapped in tight hall ways and choke points. Using a technique that Chargers use, you can reduce the warning given to your opponents. The technique in question is "snapping" where you hide the laser on the Charger until the very last second and snap to the opponent to splat them unaware. You can effectively do the same thing with the Killer Wail, hide the warning tunnel, and snap it into place at the last second. The window is still fairly large before it begins to deal damage though, so this doesn't work all the time. Also if timed correctly you can unleash Killer Wail and hit any escaping opponents with disruptors, or do so before you initiate the special. This will either pin them in place so that it hits, or at the very least make it easier to dispatch the now slow and visible enemies.
You won't be charging your special very often, since the coverage abilities of the L-3 are very poor. The special it's equipped with isn't stellar though, and shouldn't be relied on in any serious fashion. It's useful when you have it, and you can find better applications for it in maps with narrow hallways, and in Tower Control.
- Practical Usage of the Nozzlenose
The L-3 Nozzlenose does not cover a lot of territory effectively and when fired it leaves spotty ink splotches on the ground with very little splatter making travel a little harder. Due to the very ineffective ink spreading capabilities of the weapon, you'll be focusing more on kills than other weapons, making the gun more ideal for Ranked, and less for Turf War. If played in Turf War you'll want to focus more on defending choke points, and harassing with disruptors, while in Ranked you can apply the weapons offensive force more liberally.
The Nozzlenose functions similar to a revolver. Think of the time between shots as reload time, while you carefully plan your next be aware of your surroundings, and use disruptors to support, and when you need a little extra edge in battle against an opponent who's better armed. Killer Wail is for area denial as always, or couple with disruptors to insure your target is taken out.
EXTRA INFO:
- Map Applications
The L-3 is actually a very good weapon for most maps. It's range and accuracy make it a great tool for most combat situations. There are a few exceptions though. Since your mobility options are hindered terrain is important. The Nozzlenose works best on flat surfaces. When there are a lot of vertical aspects to a map the gun is likely to run into more trouble staying mobile via swimming. You'll need to rely on teammates to forge you decent pathways up these places. Also the weapon is not a great up close contender. It retains its accuracy even in close, but since most rapid fire weapons are faster - it won't win most confrontations. So large maps that allow you to keep a safe distance are ideal - smart use of disruptors are your key out of sticky situations don't forget that!
- Mode Applications
In Turf War you want to stick to splatting enemy players. The L-3 is very poor at coverage, so instead focus on covering your teammates! If you've got a short ranged player on your team, try helping them out with your superior range, and disruptors just don't go thinking you'll be making a lot of points the this weapon, it's built for splatting.
In Tower Control use of the disruptors will gimp enemy squids sitting on top. Use these to stick them to the tower for an easy splat. You can also utilize the Killer Wail a lot more here. Denying the tower to your enemy for a decent amount of time.
Splat Zones is where the weapon really shines. It's made for slaying your opponents. You'll want to be a lot more aggressive and mobile if possible, so focus on your primary weapon more here, and your sub and special second.
- Match Ups
I'll list some of the most common match ups you'll run into.
- Splattershot Pro = L-3 Nozzlenose: You won't have to much trouble with these, the L-3 is actually about as good as the Pro minus the amazing fire rate, sub weapon, and ink efficiency. Just don't let it inch you out.
- Dynamo Rollers > L-3 Nozzlenose: The Dynamo Roller has range that nearly rivals Splat Chargers. This makes it very difficult to close the gap they present. Utilization of your Disruptor sub-weapon will help with that. They still present a large threat. Use their large wind-up against them.
- Tentatek Splattershot < L-3 Nozzlenose: The Tentatek isn't particularly dangerous since you'll outrange it usually. However be wary of it's fire rate, if it get's close enough you'll likely have a lot more trouble with them, be sure and slow their approach with a disruptor.
- .96 Gal > L-3 Nozzlenose: Even though the fire rate on the .96 is very poor, it can splat you faster than the Splattershot Pro, proper flanking technique is vital in facing these opponents. Again --- Use the disruptors to aid you, these things eat up ink FAST, so they need to reload a lot. A disruptor will make sure they take longer to reload.
- .52 Gal < L-3 Nozzlenose: Similar to the Tentatek you'll outrange them. Their fire rate makes them even easier to deal with. If it's the Deco variant be ready for seekers. Otherwise this weapon isn't a threat unless it gets in close.
- Splat Roller < L-3 Nozzlenose: This is an easy match up. The Splat Roller suffers from poor range, so you can easily dispatch it with the L-3. The disruptors can tamper with them even more. Not a hard match-up.
_______________________________________________________________________________________________________________
Thank you for taking time to read my guide on the Nozzlenose. It's one of the more complicated weapons, requiring good aim, and timely shots - all while applying pressure with the disruptor. I hope my guide helps you understand and enjoy this weapon. It's very unconventional, but it's great if you practice enough with it! --- I'll be updating this guide with more detailed map specific strategies over time, so if you like the guide, and the weapon stay tuned!
