Hey everyone! It's fishy here! This is my guide on how to use one of my favourite weapons in the game - the Rapid Blaster Deco. I will try my best to give as much as insight as I can on this weapon, tips and tricks and such! I hope it will be useful to you~
Now let's start off with the basics.
THE MAIN WEAPON

Now let's start off with the basics.
THE MAIN WEAPON
The Rapid Blaster Deco is the decorated variant of the Rapid Blaster. And as its name implies, it is a fast firing blaster class weapon. It trades the blaster's OHKO shots for a faster fire rate and a longer range. This weapon kills in 2 direct hits, 1 direct hit and 1 splash damage, or 3-4 splash damage hits without any Damage Up abilities.
The blast radius of the Rapid Blaster Deco is also smaller compared to the other blasters, meaning that you will need to have better aim when using this blaster.
The blast radius of the Rapid Blaster Deco is also smaller compared to the other blasters, meaning that you will need to have better aim when using this blaster.
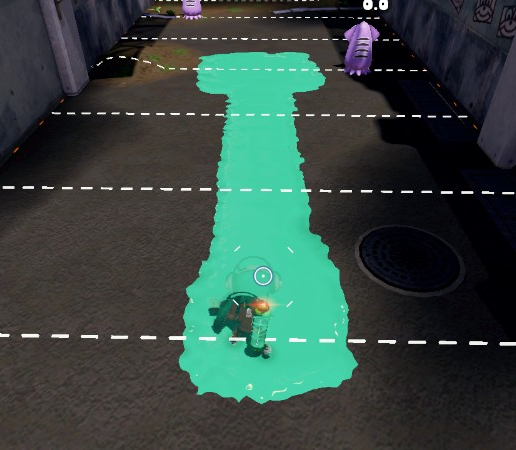
The Rapid Blaster's range
SUB WEAPON AND SPECIAL

This weapon comes with the Suction Bomb sub weapon, giving it a more aggressive play style compared to the regular Rapid Blaster, which has ink mines.
Suction bombs consume a lot of ink, and throwing one out at full tank will leave you with about 20% of ink left, after which you get 8 more shots out of your main weapon (10 if you have 1 main slot of Ink Saver Main). Suction bombs are good for forcing opponents away from their spots, and if you predict their movements correctly, you can shoot at where they are going and land that kill.
The Rapid Blaster Deco's special is the Section Bomb Rush, which is really helpful in claiming turf, capturing/recapturing the zone and also chasing opponents away from an area. With the Rapid Blaster Deco's fast fire rate and above-average inking capabilities, you can expect to get about 2 bomb rushes in a single turf war game, and about 3 times in ranked battles (unless you really die a lot).
ROLES AND POSITIONING
The Rapid Blaster Deco functions well as a mid-long range support weapon, and is, in my opinion, one of the best charger-killers out there in the game. Choke points, long corridors, corners and grates are all beneficial to the Rapid Blaster Deco. Some of the best maps to play Rapid Blasters on are Walleye Warehouse, Kelp Dome, Arowana Mall and Mahi-mahi Resort.
Since I’m bad with words, I have took many screenshots of ideal spots and angles to fire at :)
Walleye Warehouse


Shoot this corridor to prevent enemies from advancing. Beware if it's a Dynamo though, as the ink raining down on you will get you splatted.

One of my favourite spots to shoot at, especially during ranked mode. You can splat enemies on the tower, cover the zone, splat the rainmaker and so much more from this spot! Watch out for your back though.
Also need to mention this is THE spot to fire off your bomb rush. RAIN IT ON 'EM!!

Ideally, you wouldn't want to be shooting in such an open area. Only do so if you're 100% sure that there are no enemies behind you. Shooting this spot can hit all 3 ledges though.


This a a good spot to shoot at, as you can cover both common sniper perches, or splat any enemies if they are hiding behind the crate. Again, be wary of any attacks from behind.


You can get some unexpected kills from shooting at these spots. Also taking out that inkling on the crate from behind feels so good!


One of the funnest things about blasters is that you can shoot from weird angles, so be sure to utilize this advantage to your fullest.
Kelp Dome


This stage is all about the grates, man. Just shoot at those running inklings from below to splat them good!

Sometimes enemy inklings like to get to your base through this route, so shooting here will sometimes catch them off guard and scare them away.

Pretty obvious spot to shoot at. Also make sure the area around you is inked so you can make a quick escape if needed.

Enemies like to hide behind these barricades, so throwing a bomb next to it, scare them out of their hiding spot and splatting them is a good strategy to use! Just make sure you have enough ink.
Also, I believe there is a ledge somewhere there in ranked maps, and chargers really LOVE standing on those ledges, so let them have a taste of rapid blasting by going near them and firing your gun :)
Other fun spots to shoot at


As long as you know your range, and know how to exploit angles, you will find those spots to shoot from for every map :)
ABILITIES
 Damage Up:
All blasters benefit from Damage Up, but this is especially true for the Rapid Blasters, since it increases their blast radius and also the splash damage. I recommend at least 2 main Damage Up slots so you can really take out those enemies with more ease.
Defense Up:Pretty situational, but might save you from certain situations, or survive 1 more shot from that pesky .52 Gal. Since it's not essential, you can use these as sub abilites.
Swim Speed Up:Being mobile is important for the Rapid Blasters, since you want to constantly be on the move and picking off enemies, preventing them from advancing and protecting your flanks. Running Swim Speed Up is more useful than Run Speed Up in my opinion, as you already move pretty fast while firing, so Swim Speed Up gets my pick.
Ink Saver Main:1 main slot of Ink Saver Main will allow you to fire 10 more times after throwing out a Suction Bomb, which is pretty beneficial if you have to deal with close quarter combats after throwing out a bomb (This is speaking from personal experience, it has saved me tons of times).
Bomb Range Up:Suction Bomb Rush is pretty deadly if you ask me, so why not increase that deadliness with a little bit of Bomb Range Up? This ability allows you to bomb rush from a safe distance, allowing your team to reclaim the zone, or even make a strong push in Tower Control and Rainmaker.
Special Duration Up:To make your bomb rush last longer, which means more havoc rained down~ Not a necessary ability, but nice to have. A piece of gear I would like to recommend is the White Sailor Suit, as it comes with Ink Saver Main, and being the Forge brand, it has a higher chance of rolling Special Duration Up.
If anyone is interested in knowing, these are my setups I usually wear for when I use the Rapid Blaster Deco! I plan to change the cap to the Legendary Cap once I hit Level 50!
1 2
GENERAL TIPS
Rapid Blasters are best used as flanking weapons
Head-on encounters will result in your loss 80% of the time, unless the enemy is using a really short ranged weapon, like the Aerospray; Dynamos are also easy to pick off even if you’re facing them, but there is a chance that you might trade with them, so flanking is always the better option.
Know your range
This is very important as you don’t want to overestimate your range and end up not hitting your opponent, and alerting them of your position. A good thing to do is hide in your ink, advance towards an enemy from the side, and when you see the big X reticle, pop up and blast away! You will catch most people off guard like this and getting that splat!
Be mobile, be active
Staying in the same spot kills. If you failed to blast that charger off the perch, try again at a different angle. Knowing when to retreat is also essential, it’s better to escape a disadvantageous encounter rather than risking a trade or a complete loss.
Fight alongside your teammates
Rapid Blasters don’t function as well when they are alone (unless you’re really good I guess) and being there to support your teammates is always good! Help clear off enemies for your teammates, check their flanks and they will do the same for you.
Stay calm at all times
Missing a shot isn’t the end of the world. Even if you are in the face of danger, stay calm, aim, and blast that 2 shots with confidence :)
CONCLUSION
The Rapid Blaster Deco is definitely not a bad weapon, you just need the time and patience to learn it, and master it. It’s not the easiest weapon to learn, so I recommend starting out with the regular Rapid Blaster first and get used to the main weapon itself, then moving on to the Deco version if you want to play a more aggressive play style.
That’s it for my guide folks! I hope this guide has helped you in anyway, and happy blasting!