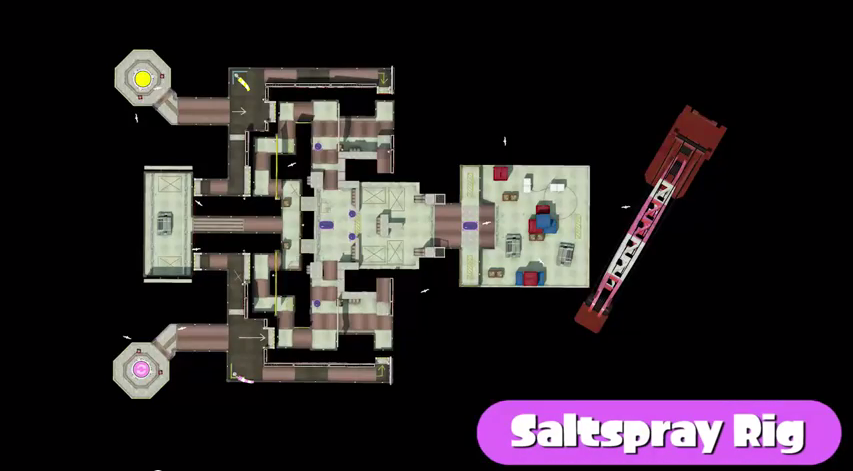
Ahh, Saltspray Rig. One of my favorite maps, though I understand if many people hate it. In terms of Turf Wars, the fight often centers around the large area near the crane (the square area on the right side of the map here) as well as frequent smaller battles for control over the small area right in between both bases, which is quickly accessible from spawn.
Ranked play, as you might imagine is markedly different. Let's go over some of the unique problems and opportunities that Saltspray Rig presents.
1. Where the deep fried flying f*** did she come from:
There is a LOT of verticality (upy-downy) to the fighting around the Splat Zone on this map. Unlike other maps, most notably Urchin Underpass, the elevated area around the Splat zone is not uniform. Lets take a closer look.
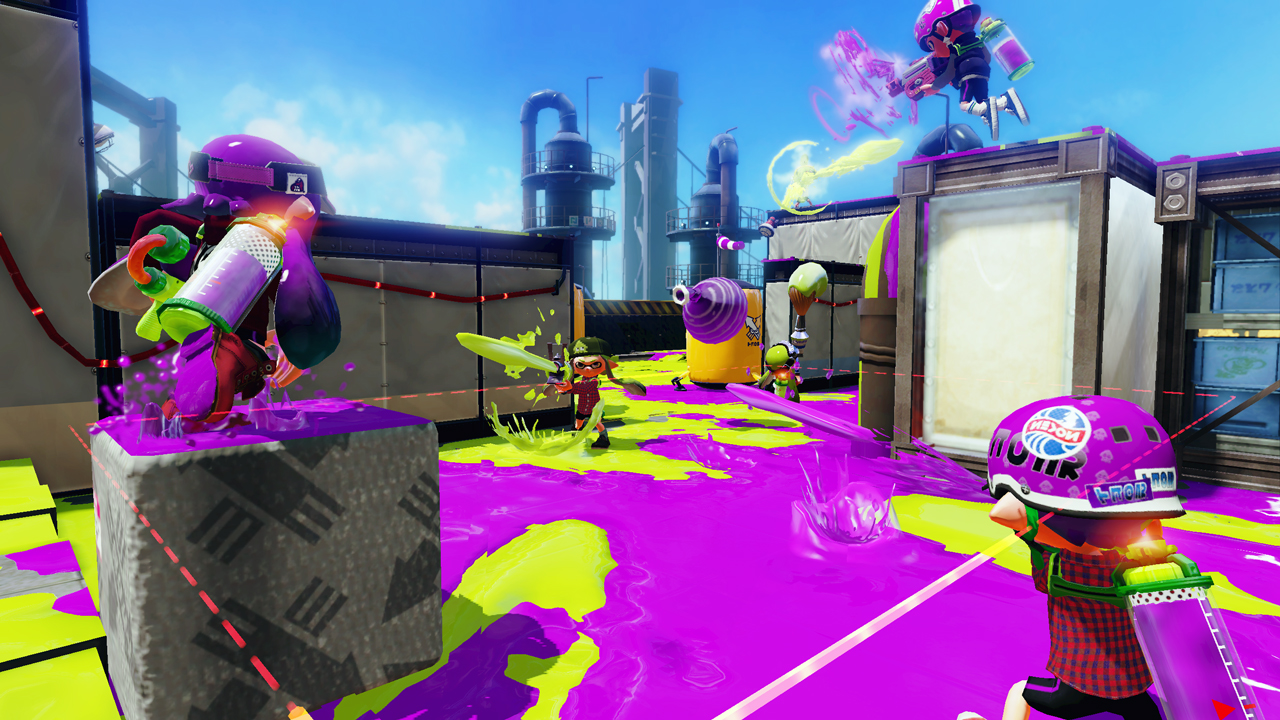
Notice in the picture above that there are inklings on several levels. The heights are uneven, and the platforms are not necessarily even across the zone. Use these to your advantage. Put some paint on them and hide there waiting for the enemy to come. It's not only unlikely that the small square where you're hiding will get covered in ink (since they will likely be focused on the zone or visible enemies) but also you'll be just out of their natural line of sight, making them easy prey. Once the enemy wises to your game however, it can be dangerous...as there's little camouflage from your elevated position, making you an easier target to see and mark. Here's another angle.
In this picture (courtesy of a GameXplain video) we can see a few more great spots where you can use the verticality to get an edge. Placing a sprinkler where the red star is on the central platform is great for maintaining at least a neutral zone during heated encounters. The two platforms indicated with the green arrows can be painted up to and on, providing a great hiding spot and a very under-used sniping outpost that is also within splattershot range of the zone itself.
In sum, use verticality to your advantage, but watch out for the retaliatory airstrikes right on top of your favorite spot! Stay on the move and switch platforms when you feel the enemy is moving to focus you down. If you have the Aerospray RG, plant a mine on top of the tower before you hop off to leave a wonderful surprise for any enemy who thinks to copy you after forcing you off.
2. The partial barrier is your friend (who will leave you if you suck)
In the first picture in the above section you saw a small bottleneck that sits in between the zone. Here is a view from above (zone is very roughly depicted)
The splat zone doesn't sit evenly across the barrier, most of it is on the inner side of it. This barrier complicates the fight quite a bit. First off, it favors the defender, like any choke-point would. Not only are there more defensible positions on the inner side of the barrier, but the layout makes mines considerably more effective.
Secondly, there is no way to hit the entire zone from a single spot. You have to go around the barrier to cover it. This makes rollers a much less effective choice for this map, as well as taking the edge of the incredible advantage inkstrikes can give you naturally in this mode.
Finally, though the defender has the advantage in the fight to some degree, if there is a heated fight around the barrier, it's pretty easy for the attacking side to maintain their ink on the outer side, and use it to quickly force the zone into a neutral state.
3. Go in fast and hard, just the way I like it baby
This is the most consistently solid strategy that I've worked out for this map. One heads for the elevator, two for elevated positions from their side, and one either directly into the fight around the barrier or past it to slow down the other team, depending on how fast you got there.
Speaking of fast, speed is KEY on this map, since it favors the defenders. Get into a good position quick and it's not that hard to maintain your advantage and get a knockout. Conversely, if you're too slow or fall into a pit (DAMMIT) then you're gonna have to focus on getting lots of kills to get them out of the zone and take it for your team.
This is not Turf Wars, so inking the ground is definitely NOT your priority here, but that doesn't mean you should neglect it. The area outlined in green is great for defenders to set up super jump beacons and build up specials. When you've splatted the team back to their spawn, take a sec to run over and cover some ground back there and establish a place from which you can stage a solid comeback if your team gets pushed back out of the zone.
On Weapon Choices:
As I said before rollers aren't nearly as useful here as they are on other maps because of the barrier. That doesn't mean they aren't good, but I think there are better choices. Inkstrikes, while still very useful, are not as useful as the bubbler (and can be countered by them too :D). Ink Mines are amazing, and sprinkers are pretty good. Seekers are pretty bad, though. With all that said here are my top picks per category.
Shooters: Rapid Blaster OR Aerospray RG. Depends on your playstyle. Both have ink mines, but the rapid blaster has the Bubbler (OMG SO OP PLZ NERF LOL BBQ) which I prefer over the inkstrike. I play with the Aerospray more often however, just because it's more fun to actually shoot with. To each his own.
Chargers: Kelp Splattershot. Killer Wail is not bad at all for just clearing a zone, and I like tossing a sprinkler out from a high vantage point.
Rollers: Krak-on Roller. See the Kraken. Smell the Kraken. Feel the Kraken. Become the Kraken. Also, make sure whenever you activate the special you yell "KRAK KRAK MOTHERF***ERS" into the gamepad. Nintendo is likely collecting data on how useful voice chat would be and this would definitely be one for the YES column on their list.
Thanks for reading the guide! I'll be doing one for every map in Ranked Play...stay tuned, and have fun splatting!
