The Tenta Brella - a weapon with so many deficiencies that some ascribe to it no potential at all. Yet, in spite of its flaws, in the right hands, the Tenta Brella can become a devastating tool and the cohesive force that bonds a team together.
This guide will not only provide a starting point for this difficult-to-master weapon, but also keep in mind experienced players who may already know some of its playstyles and attributes. Either way, it will enhance your knowledge of this unique Brella!
A few beginning notes:
- While this guide is primarily for the original Tenta Brella, certain parts can be applied to the Tenta Sorella Brella or even other Brellas.
- The views expressed in this guide are as objective as possible, considering the weapon itself and its set before supplying strategies and tactics.
- Please feel free to leave any questions or concerns if you have them!
How the Tenta Brella Works
As a sort of refresher, the Tenta Brella functions similarly to a shotgun, with a singular, powerful shot. Each shot is technically comprised of seven different ink bullets, but it is relatively easy to land most of them. The shots have a large amount of both beginning and end lag, but make up for it with an incredible capacity for power - the max damage the Tenta Brella can do with one shot is 122.5, more than a OHKO!
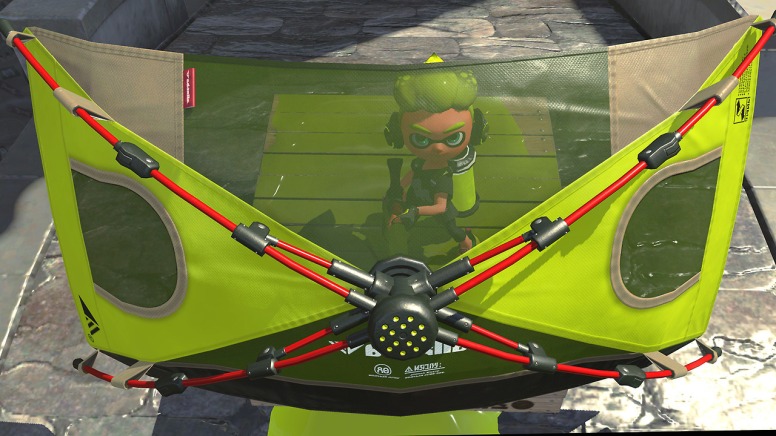
The shots consume 10% of the ink tank each, so only 10 shots can be fired. After firing one shot, continue holding down the ZR button to deploy your shield, which, appropriately enough, is a tent. After 1.75 seconds, it will launch, which is a much shorter time than the other Brellas.
This shield, covered more in depth later, has 700 HP, allowing it to withstand an outstanding amount of ink and can counter (temporarily, of course) practically any special or the Rainmaker weapon.
The Set
The Tenta Brella has an interesting set, to say in the least. Here is a short description of each component:
- The Tenta Brella - an ink shotgun with a long range and increased power. It can also serve as a virtually impenetrable shield.
- The Squid Beakon - the sub weapon. Squid Beakons are devices resembling small cell phone towers to which any member of the team can Super Jump at any time. Only three Beakons can be placed, and each can be used twice (or once if the Inkling who placed it jumped to it).
- The Bubble Blower - the main weapon. The Bubble Blower enables the player to blow three large bubbles. These bubbles will slowly float in the direction they were dispersed, and after a certain amount of ink has been shot at the bubble (from any teammate), it will create a highly damaging explosion, especially when it causes a chain reaction with multiple other bubbles.
The Classification
The title of this guide is "The Ultimate Camper." No deception is involved here. The Tenta Brella excels at defense and camping in particular. Its protecting tendencies and components make it a pure support weapon.
To further this theory, think about one aspect of its main weapon - holding down ZR (as mentioned) will unleash a wide tent that can not only protect you, as most other Brellas do, but also one or two other members of your team. The tent itself, once released, can also ink a veritably thick trail that enhances its turfing capabilities, helping teams gain map control.
Speaking of map control, Squid Beakons sufficiently broaden your team's capabilities as regards flanks, pushes, defense, offense, and map presence in general. If you are diligent in your placement of Beakons, your team will always be able to recover from a temporary shutdown.
Bubble Blower is, perhaps, the most effective supportive special. It not only blocks enemy shots, defending your team, but increases the number of areas your weapons can reach. Its offensive potential is also extremely high, as just one explosion can leave an opponent splatted or weak.
Strategies
The Tenta Brella has many defects - it is slow, heavy, and inconsistent in terms of damage. To discover strategies related to this weapon, therefore, is to address and mitigate these weaknesses. Here are some strategies that directly deal with some notable weaknesses of the weapon:
- Limited movement - in other words, slowness. The Tenta Brella suffers considerably from this impediment. To counter this, limit the amount of time you spend out of ink, unless specifically turfing to fulfill your supportive playstyle; instead, only shoot where you need to go or to distract other players. Also, Swim Speed Up is an excellent tool for heavyweight weapons.
- Protracted fire rate - the Tenta Brella, as mentioned, has large amounts of start and end lag per shot fired. To counter this, do your best to calculate your aim precisely. Misses are easily punishable. If you do miss, keep holding down your shoot button to deploy your shield, if only for a moment, to guard against potential ambushes. The training area is a great way to practice delivering on the Tenta Brella's unique and powerful shots.
Here are some tips and tricks on using some of the Tenta Brella's features:
Shield - with most other Brellas, the shield is only useful when directly in front of you and you will become vulnerable if it detaches. The Tenta Brella differs greatly in this regard; your detached shield can become a mobile headquarters of sorts, and with the right positioning in it, you are practically invincible from any angle. Coupled with your powerful OHKOs, you can quickly become a force to be reckoned with. When in a tight situation (or even just in a busy area), never hesitate to release your shield if you think it will benefit an escape or launch a new attack.
Shots - the Tenta Brella actually covers more turf than you may think, making it more than average at gaining control of choke points with its shield, long range, and strong offenses. Its special charges very quickly as well as a result of this.
Beakons - the aforementioned Beakons enable your team to have incredible map presence, an essential tool for game modes that encourage flanking and mobile, isolated skirmishes. This may seem counterintuitive to the bulky, relatively immobile Tenta Brella, but remember that your main purpose is to assist your teammates who may benefit from this approach more than you do. Moreover, well-placed Squid Beakons allow you to see any enemies lurking near them on the map, helping to prevent ambushes.
Bubble Blower - throwing these three, virtually unstoppable bubbles into a high-traffic area will almost certainly result in progress, whether in the form of splats or turf. Either way, your team greatly benefits from the simultaneous protection and attack provided by your bubbles (reflecting the Tenta Brella itself!)
Some other strategies to consider, whether in specific situations or just in general:
Help Your Teammates! The Tenta Brella's biggest strength is assisting other players gain splats or push the objective. It is a team weapon, so never stray far from teammates unless going solo is the only option at the moment. Even if you do so, try to have backup (such as a loosely following teammate, or your Bubble Blower) so that in case things go from bad to worse, you have alternatives. Detaching your shield can give you extra time to Super Jump back to your spawn point or Beakons. Further, if your team gets wiped, it is rarely a good idea to keep fighting on your own - retreat and wait for reinforcements!
Be Tactical in Beakon Placement! Placing Beakons in the open can work if your team has sufficient map control, but otherwise, placing them in hard-to-see areas or around corners is wiser, so that opponents must go out of their way if they are absolutely intent on destroying it. Remember, also, that if a Beakon is too off the beaten track, teammates may not utilize it as it takes more time to get back into the action. As of recent updates, Beakons can now be used twice (unless the placer of the Beakons jumps to them).
Combine Your Shield and Bubble Blower! This is now a well-known tactic, but it is as follows: Detach your shield, and then throw your bubbles into it. At worst, it's a distraction; at best, it successfully lures a couple opponents into their untimely demise. Either way, if performed properly, the shield should gradually inflict damage on the bubbles until they explode autonomously.
Shield Damage! As mentioned above, your shield can inflict damage on both objects and opponents. While this should not be used as your primary form of combat, it is an alternative if you need to distance yourself from the action but want to leave a parting gift for your opponents.
How Far From the Battle? This is a common query when using the Tenta Brella. Since it is generally considered a supportive weapon with a few backline tendencies, a good Tenta Brella should venture near the action, but not too close. Occasionally, you can advance to the front lines, but only to dispense bubbles, your shield, or a strategically placed Beakon. Don't continue there for too long, or you may overstay your welcome.
When Opponents are on the Offensive? This is where the Tenta Brella excels. Keep teammates coming in with Squid Beakons, and a few well-timed shots, followed by shield deployment(s), will discourage opponents from launching a full-scale attack. Again, should you find yourself alone, try and retreat unless you have backup options. Don't hesitate to use Bubble Blower as a way to cover your retreat; if you play the weapon well, you are a uniting force for your team and your presence is more useful than your special.
When Opponents are on the Defensive? Surprisingly, the Tenta Brella can be played offensively, but conservatively at the same time. Be cautious with your movements, and let your more aggressive teammates rush in for splats. Advancing forward your line of Squid Beakons and charging up your special is integral to a push's success (especially in Clam Blitz).
Game Modes
Below are some strategies you can employ for various game modes:
Splat Zones - your first goal should be to place Beakons preemptively to anticipate pushes and counterpushes (both near and distant from the zone(s)). Suppressing opponents is another excellent tactic, and covering the zone with your shield and bubbles can fulfill your role as support. Since the objective does not move, finding one good spot to camp can counter opponents' moves and pushes.
Tower Control - unsurprisingly, the Tenta Brella's best position in Tower Control is on the Tower itself. Opening the shield in congested areas and choke points can protect yourself and anyone on the tower with you, with bubbles having the same effect. One tactic some Tenta Brellas tend to employ is occasionally jumping off the tower to place Beakons along its route.
Rainmaker - this is the singular mode where the Tenta Brella truly reigns supreme as the Rainmaker's protector. Your shield can allow the Rainmaker to push where it would otherwise seem impossible. The Bubble Blower can enable teammates to gain momentum on these pushes, with Squid Beakons constantly taking teammates back to the action.
Clam Blitz - Many have attested to the Bubble Blower's importance in Clam Blitz. This is your goal - to charge bubbles and maintain your charge until a push is needed. Also, a quick side note; Clam Blitz is one mode that the Tenta Brella can actually benefit from flanking. Squid Beakons near the enemy's basket can allow teammates to jump to it and score.
I sincerely hope this guide improved your Tenta Brella gameplay. The Tenta Brella is my most-used weapon, so I'd like to think I have some expertise in the area. Any reviews, questions, or concerns are welcome!
Side note: this guide may receive some minor updates in the future.
Recommended Abilities
- Special Power Up: for Bubble Blower, this vastly increases the size of your bubbles and their lethality.
- Special Charge Up: since bubbles are extremely helpful to any push, this can help keep them at your disposal and allow you to use them at your discretion, whenever circumstances allow.
- Object Shredder: to pop your bubbles faster.
- Sub Power Up: for faster jumps to Beakons.
